
Recently, I was thrift shopping and I was about to give up hope on finding anything truly special. Suddenly, I saw what appeared to be a vintage wrap dress. I pulled it out of the racks and checked the label... it was a Diane von Furstenberg wrap dress! For only $25! In my size! I could not believe my eyes! (I hope the exclamation points are giving you a hint of how excited I was and still am about this.) I never imagined that I would find a designer dress that I could afford, so I quickly bought it and brought it home. Unfortunately, there was one problem... I had no idea how to wrap it properly, especially once I saw a slit on the side that was clearly meant to be there (it was sewn in, not a rip). A quick search on Google brought me to this website. I found the tutorial to be helpful, but I wished that it had pictures, so I decided to take some of my own for you!
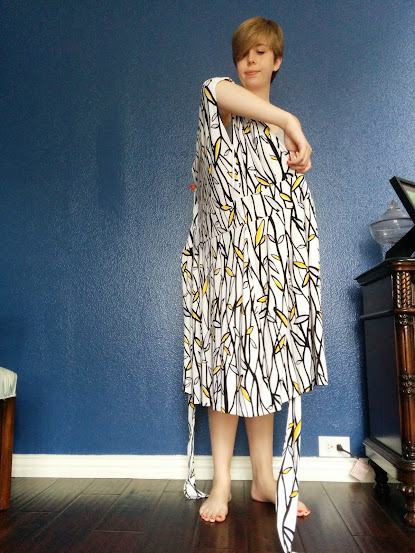
1. Put your arms through the armholes. (This is probably fairly obvious...)
2. Find the slit that I mentioned earlier. (Here I am pointing to mine.)
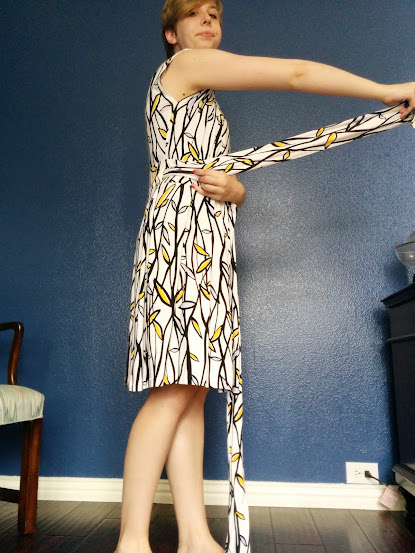
3. Take the tie/sash thing on the opposite of the slit and...
4. ...put it behind your back (but still inside the dress). (Also, I am sorry about my clothes that I wore under the dress to show you how to wrap the dress. I did not even know this tank top had a hole until looking at the pictures later.)
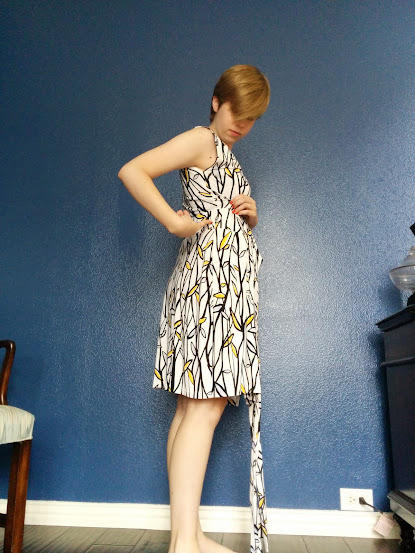
5. Now, take that sash from inside the dress through the slit so it is now outside of the dress. You want to pull it tight enough that the dress is beginning to cling to your body, but not too tight.
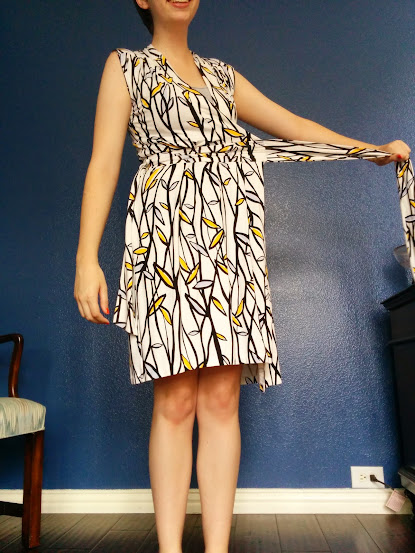
6. This is a good time to grab the other tie/sash thing (the one that you did not bring through the slit).

7. Wrap that tie that you just grabbed around your body (outside of the dress; because it is a wrap dress). Both of your ties will be pointing the same direction because both of the ties wrapped in the same direction (mine both went to my left).
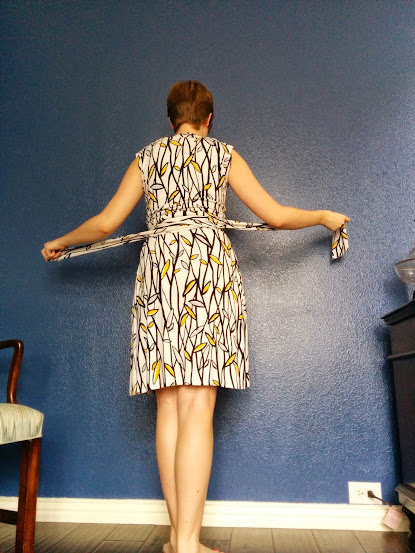
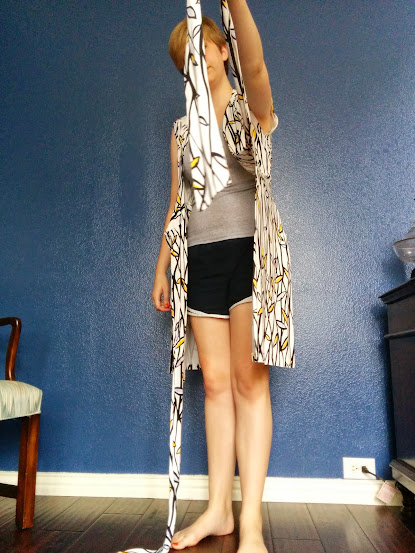
8. Now, you are going to cross both of the ties so they are facing different directions so one can go around the front and the other will wrap around your back. This is what it looks like in the back...
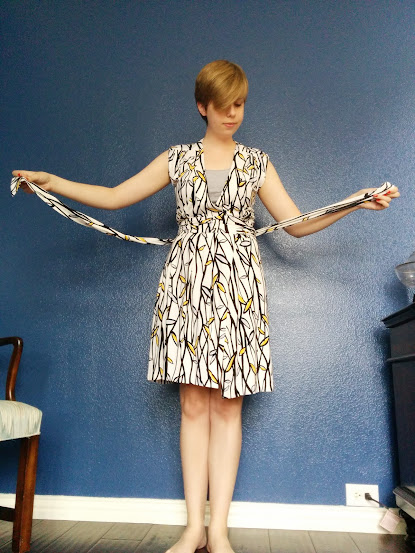
9. ...And this is what it looks like in the front.
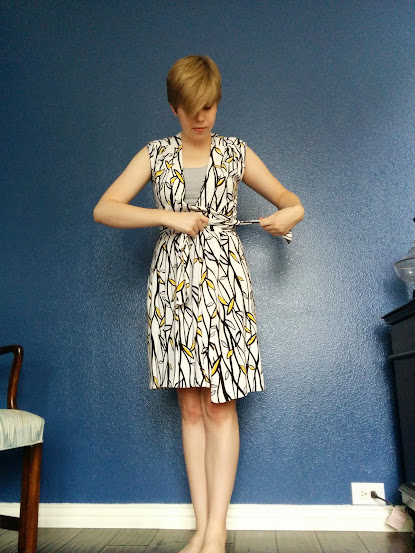
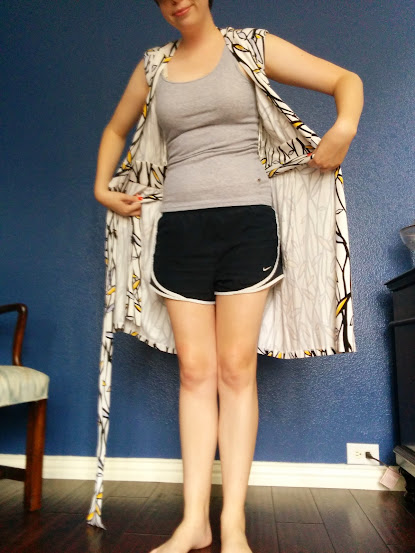
10. You are now going to bring both of your ties to the side opposite of the slit. As previously mentioned one tie goes around your front and one goes around your back. Now you can tie the ties/sashes!

11. This final step is optional: If you notice, quite a bit of my tank top is still showing, because the dress is cut to be sexy/revealing. So, after I removed my clothing under the dress, I safety pinned the top so I could feel a little more comfortable and confident.
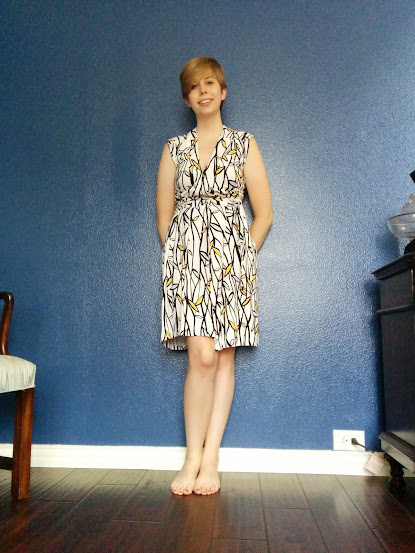
TA-DA!
If you have any questions or need any clarifications, please let me know! Also, if you have any awesome thrift finds, I would love it if you shared with me via Instagram!
I hope that you have a great weekend,
Rachel Cathleen
yeezy boost 350
ReplyDeleteyeezy
golden goose sneakers
yeezy shoes
supreme clothing
longchamp bags
yeezy
stone island
retro jordans
curry 6
click this link now click this redirected here https://www.dolabuy.ru/ investigate this site replica bags online
ReplyDeletesite Web ici Dolabuy Celine cliquer sur ce lien maintenant www. dolabuy.co je lisais ceci répliques de sacs ysl
ReplyDelete